Appearance
Rectangles, ellipses, paths and text are painted with fills and strokes. After that, filters, masks and clipping paths are applied. The result is then composited with opacity and blending into the canvas.
Fill and Stroke
You can modify the fill, stroke and their opacities in the Property Panel.
Select the fill or stroke button to modify colors. Fill and stroke can be set to none, a solid color, linear gradient or radial gradient. Swatches help organizing colors.
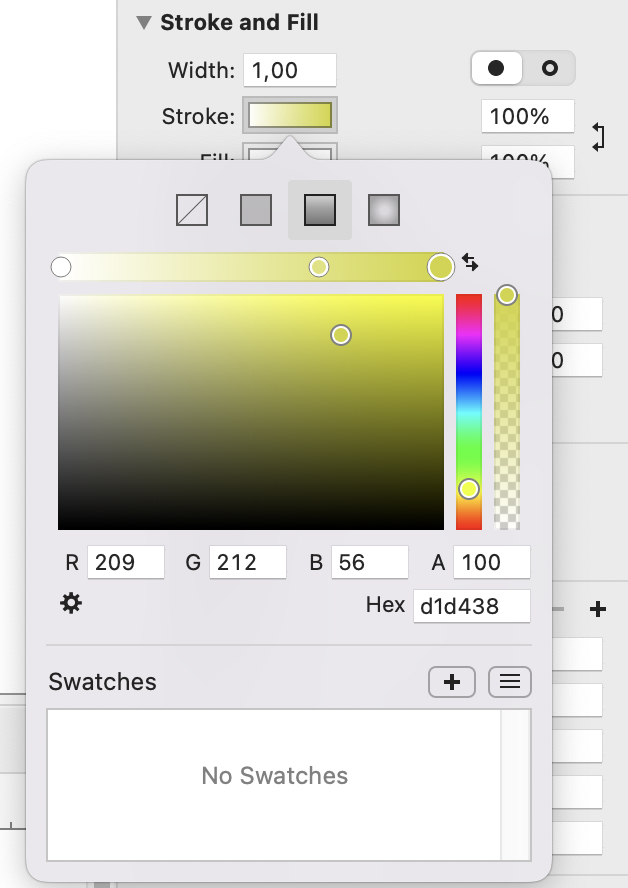
Color values can be entered as RGB (red, green, blue) or HSL (hue, saturation, lightness) values by selecting the mode in the action menu. Also, six digit hex values can be entered.
The alpha value (0-100) changes the transparency of the color. It is also possible to use the fill and stroke opacities to change the transparency of the color.
A gradient bar is shown for linear and radial gradients. To add a new stop color, click on the gradient bar. To delete a stop, select it and press the Delete key. You can drag a stop to change its offset.
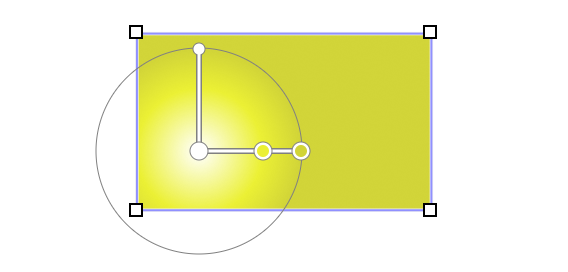
When the color popover is open, the Node tool displays gradient control handles on the canvas. You can move the handles to change the position of the gradient and its stops.
You can modify the fill rule of objects. The fill rule determines how self-intersecting paths are filled. Select the filled or open circle button to select a non-zero or even-odd winding rule.
Advanced Stroke Properties
Finer controls over stroke appearance can be found under the Advanced Stroke property section. You can adjust the following:
- Cap - the shape of the stroke caps: butt, round or square.
- Join - the shape of the stroke joins: miter, round or bevel.
- Miter - a value indicating when a sharp or a bevel join is used, applicable only when join is set to miter.
- Dash - stroke dashing, made of dash and gap values separated with semicolons.
- Offset - dash offset from the beginning of the path.

Filters
There are ten different filter effects that can be applied to objects. You can add them to objects in the Property Panel by clicking the Add (+) button in the Filters section and choosing a filter. To delete a filter, click the label of the filter and click the Delete button. To move a filter up or down, click the label and the up or down arrows.
Keyshape supports CSS shorthand filters and they can all be animated. The filters are:
- Blur - Applies a Gaussian blur that blurs in all directions.
- Brightness - Adjusts the brightness of the object. A value of 100% leaves the object unchanged.
- Contrast - Adjusts the contrast of the object. A value of 100% leaves the object unchanged.
- Drop Shadow - Creates a drop shadow with X and Y offsets and the given color and blur radius.
- Grayscale - Converts the object to grayscale. A value of 0% leaves the object unchanged, 100% is completely grayscale.
- Hue Rotate - Applies a color shift to the object. A value of 0° leaves the object unchanged.
- Invert - Inverts the colors of the object. A value of 0% leaves the object unchanged and 100% is completely inverted.
- Opacity - Adjusts the opacity of the object. A value of 100% leaves the object unchanged and 0% is completely transparent.
- Saturate - Saturates the colors of the object. A value of 100% leaves the object unchanged and 0% is completely desaturated (grayscale). Values above 100% create super-saturated colors.
- Sepia - Applies a sepia color filter to the object. A value of 0% leaves the object unchanged and 100% is completely sepia.
When you import SVG files that use traditional SVG filters, Keyshape will not display them. However, those filters will be preserved and you can still see them in web browser previews and exported SVGs.
Applying filters to objects can have an impact on performance in SVG animations. Blurs and drop shadows with large radius on large objects tend to have a strong impact on performance on web browsers. Use filters sparingly in SVG animations and always check how they perform in browsers.
Note: Safari cannot display CSS shorthand filters. When the animation is exported, it is possible to convert CSS filters to SVG filters by using the Write SVG 1.1 Filters export option so that filters are displayed correctly on Safari. When you export Animated GIFs or videos, then all the filters can be used without any compatibility or performance issues.
Opacity, Visibility and Blending
To make objects semi-transparent, change the opacity value. The opacity value can also be used to fade in and out objects.
Visibility can be used to animate the visibility of objects. It works the same way as CSS visibility, which means that child objects can be animated to become visible even if the parent object is invisible. If that is undesirable, then opacity animations should be used.
Blending affects how objects are composited over underlying objects. By default, objects are composited over all objects under them. It is possible to isolate blending to affect only a subgroup by selecting the isolation option.
Note that automatic isolation occurs if the opacity is not 100%, blending is not set to Normal or a filter effect is applied.
Swatches
Swatches make it possible to reuse and update colors in multiple objects. A swatch can be a solid color or a gradient. Swatches are managed in the Palette Panel.
To create a new swatch, select an object with a fill or a stroke and press the Add (+) button in the Palette Panel. The object's fill and stroke will become swatches.

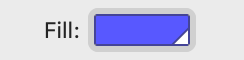
To use a swatch as a fill or a stroke, select the swatch in the Palette Panel, Ctrl-click it and select Apply as a Fill or Apply as a Stroke. Alternatively, select the swatch in the color picker. A small white triangle will indicate that the color is linked to a swatch as shown below.
To edit a swatch, double click it in the Palette Panel. Editing a swatch will change all colors linked to it.
To rename a swatch, select the swatch and choose the Rename Swatch command under the Action button.
To duplicate a swatch, select a swatch and choose the Duplicate Swatch command under the Action button.
To delete a swatch, select a swatch and press the Delete button.
Swatches can be imported from other Keyshape files or Adobe Swatch Exchange (*.ase) files. Choose the Import Palette File command from the Palette Panel's Action menu to do that.
To import swatches from system palettes, select Import System Palette and choose the palette to import. The colors are imported as sRGB colors, which match the system palette color values when it is showing sRGB values. If a system palette is changed while Keyshape is running, then Keyshape may need to be restarted to see those changes.
Eye Dropper
You can copy the fill and stroke of an object to other objects with the Eye Dropper tool. Select the objects to be changed, then select the Eye Dropper tool and click the source object, i.e. the object with the fill and stroke color to be copied.